The content clock method for planning content is something I sketched out when I was planning and organizing a year’s worth of guest blog posts I’m writing to place on DesireJesus.com. As far as I can tell, I invented the method. Here it is. Please use it if it helps you.
What is a content clock?
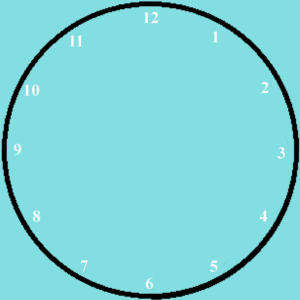
Picture a clock face with numbers around the edges. The first post title/topic goes at 1:00 on the clock face. The other titles/topics go in order around the clock, ending at 12:00.
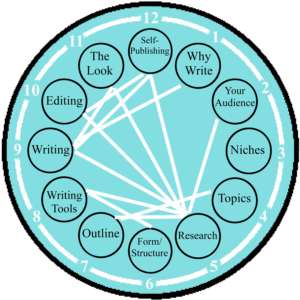
In mine, there’s a connection between each post and the one following it, so there’s a line between them. These line segments form the outside of the clock face, the border around the edge. The connection can be some kind of chronological progression such as steps in a process; it could be themes or some other logical connection. On your content clock, there might be some places where there isn’t an outside border, and that’s okay. Not every number has to be connected to the next one for that piece to belong on the content clock.
Organization for productivity
Getting your ideas organized will help you to be more productive. Once you know what to write or create and where to put it, it’s much easier to get the writing done. The organization does take time to do, but it saves several times as much time in the long run, and it’s completely worth doing.
Writer’s block is commonly thought to be “I don’t have any ideas,” but in truth, it’s usually “I have too many ideas and don’t know where to start/what to do first.” When you know exactly what to put into your book and where, it almost writes itself.
How to apply the concept of the content clock
This concept can be applied in a few different groupings as well: 12 hours, 12 weeks, 12 months, and even 12 years. It can be applied to social media content, blog posts, book chapters, or books.
Think about the content that is needed. Choose a way to segment it. If what you’re writing about is a process, then it’s an easy choice to break it into chronological order. You might choose a thematic organization instead, especially if things don’t need to be done in a specific order, or if it’s not about doing things at all but different segments of information. Then break it into 12 segments.
How to Create a Content Clock
Get a piece of paper (I love the large easel pads, but whatever you have or like will work). Draw an analog clock face with just the numbers around the edge. You can add an outer ring if you’d like. You’ll draw in connecting pieces around the edge and running between the numbers only for each item that is connected to the one before or after it.
Choose whether to organize your work in a chronological format, thematically, or some other way. Organize your pieces (blog post titles/topics, book chapters, etc.) into 12. Don’t force it. If you’re doing blog posts, and you think of 10 that fit in this series, that’s fine. You can always put two different but related pieces of content at the 11 and 12 on the content clock. You might choose lead magnets or related videos, for example, to go with your 10 blog posts. If you have 24 pieces, you can make two content clocks. Draw 12 circles, one just inside each of the numbers. Then put a topic or title into each circle. You can call it done, or you can go one step further, as I do (See below).
Increased effectiveness
I combine this method with the content web structure, which resembles a spider web. So my content clock is overlaid with the content web for even more effectiveness. My content clocks end up looking like some strange pieces of string art, but that’s okay because they work well. Here’s what my dual drawing looks like for the 12-post series so far. As I write each post, I’m sure I’ll find more connections between them, and I’ll add more lines to my content clock with content web overlay. Each white line represents a hyperlink between the posts it connects.
I hope you find this useful. Go, have fun making your own content clocks.
Leave a Reply